GitHub Pages: Hosting Jekyll Site from a Separate Directory
aka How I hosted this site.
When building this blog, I didn’t want to put this on the root directory, so I can put more custom static pages in case I need it. At the end I managed to host this blog under /blog directory. This post is to list what I did:
Repository settings
The repository for this blog can be accessed here.
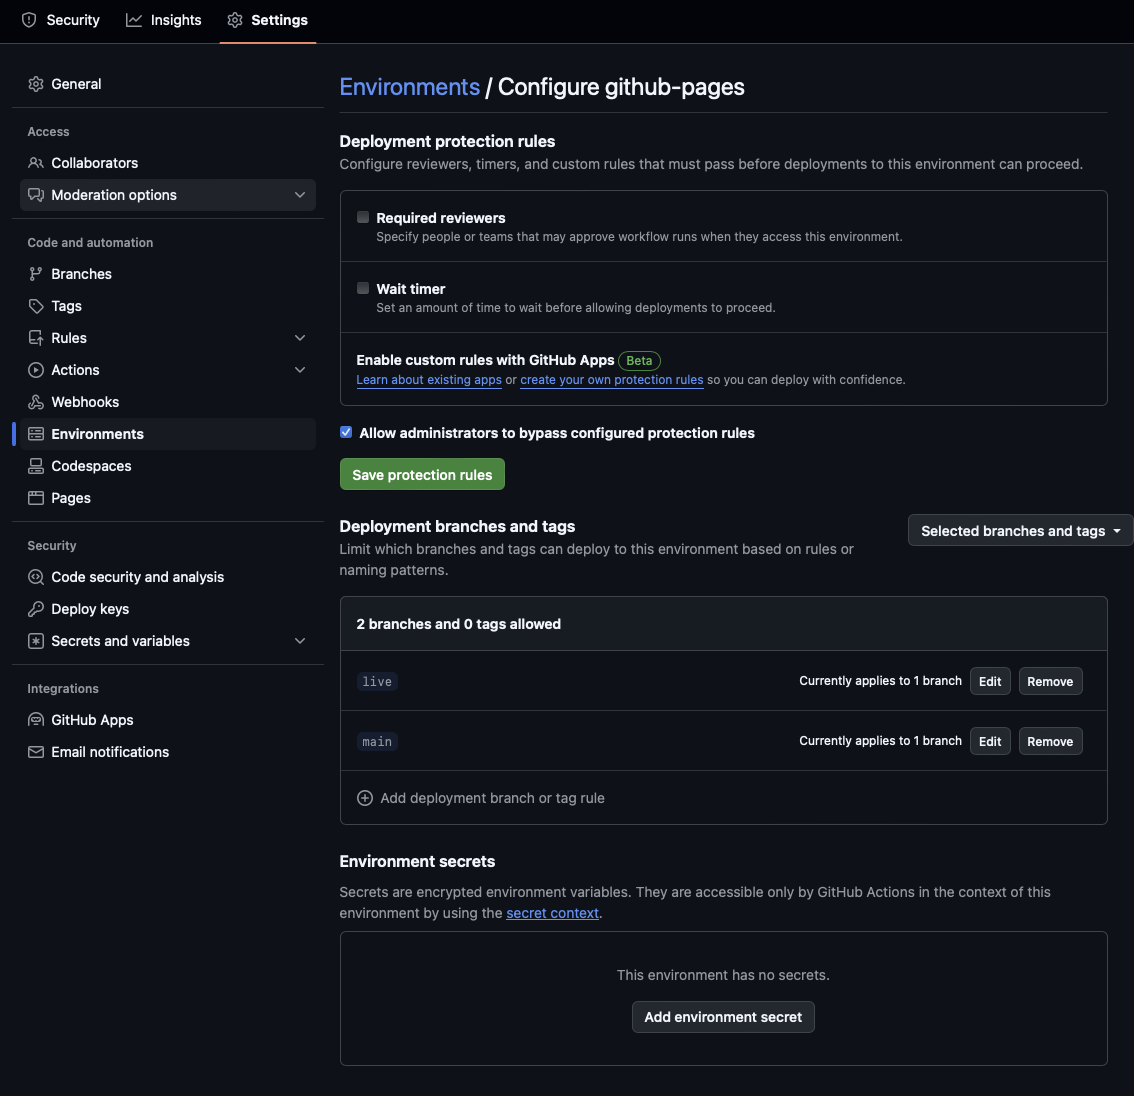
Environment settings
I planned to have a separate branch as the source of deployment called live. I created the environment setting called github-pages.
 Environment settings for
 github-pages.
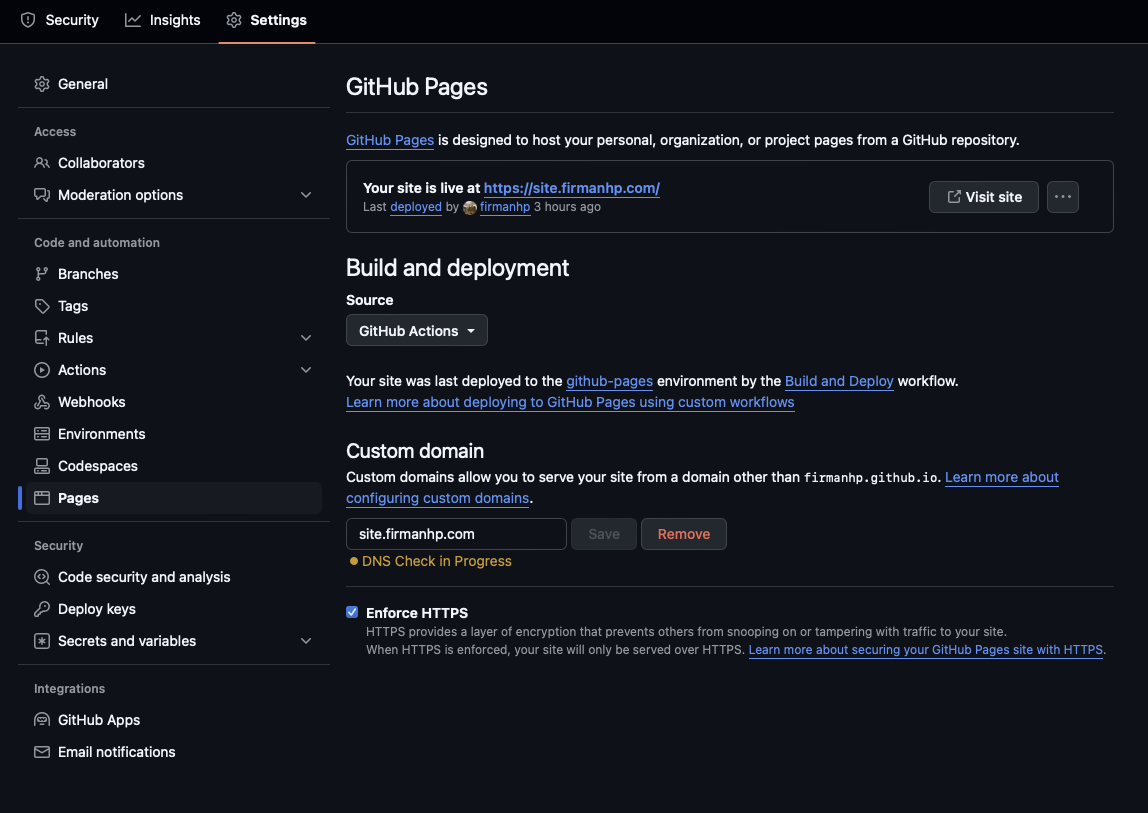
GitHub Pages settings
I am using a custom GitHub workflow to deploy my pages, which I will explain later.
 Pages settings for the repository.
The Goal
How GitHub Pages works is it accepts a single artifact containing all your static files and will display it the same way your organize the artifact. You’d want to have your artifact to contain this structure:
1
2
3
4
5
6
7
8
9
10
(artifact)
|
|-- (root directory pages)
|-- blog/
|   |-- (your static site)
|-- my_other_site/
|   |-- (your other static site)
|-- my_other_site2/
|   |-- (your other static site)
|-- ...
In my case, I currently have 1 blog/ site, and a couple of HTML pages for the landing pages (index.html and 404.html) located in landing/. My finalized artifact would look like this:
1
2
3
4
5
6
(artifact)
|
|-- index.html
|-- 404.html
|-- blog/
|   |-- (my blog Jekyll site project)
In the above case, when opening the root directory, we will be greeted with a page from index.html and be given 404.html when the user accesses a nonexistent page. My blog will reside inside the blog/ directory.
Constructing
Landing Page
Everything is quite simple here. I just wrote few lines of HTML for these pages. They are located in the landing/ directory in the repo. I may replace these with another static site packages later.
Blog Page
This is a bit more complex since I decided to use jekyll-theme-chirpy. I grabbed a starter project from the chirpy-starter repo and slightly modified the _config.yml. I placed the whole project inside blog/ directory of my repo. Most important parts of the modification were:
1
2
3
4
5
6
7
8
# The base URL of your site
baseurl: "/blog"

# Fill in the protocol & hostname for your site.
# E.g. 'https://username.github.io', note that it does not end with a '/'.
# NOTE: I actually don't know how they used this, since every links that I
#       saw actually did not have this embedded.
url: "https://firmanhp.github.io"
After that, I try to run it locally using the provided scripts insied tools/ directory to see if everything works normally, and every pages are located within /blog directory.
Deploying
The chirpy-starter repo conveniently provides a GitHub workflow configuration. However, I had to do some modifications to make it run properly on my repo, mainly:
Building the blog
Hardcoding /blog instead of using actions/configure-pages output. I didn’t know how that action works, probably it fetches some parameters in the repository settings that I forgot to set, and by then {{steps.pages.outputs.base_path}} outputs an empty string for me.
1
2
3
4
5
6
7
8
9
10
11
12
13
14
15
16
17
18
19
20
21
22
23
24
25
26
27
28
29
30
31
32
33
34
35
36
37

jobs:
  blog_build:
    runs-on: ubuntu-latest
    defaults:
      run:
        working-directory: ./blog

    steps:
      - name: Checkout
        uses: actions/checkout@v4
        with:
          fetch-depth: 0

      - name: Setup Ruby
        uses: ruby/setup-ruby@v1
        with:
          working-directory: ./blog
          ruby-version: 3.3
          bundler-cache: true

      - name: Build site
        run: bundle exec jekyll b -d "_site/blog"
        env:
          JEKYLL_ENV: "production"

      - name: Test site
        run: |
          bundle exec htmlproofer _site \
            \-\-disable-external \
            \-\-ignore-urls "/^http:\/\/127.0.0.1/,/^http:\/\/0.0.0.0/,/^http:\/\/localhost/"

      - name: Upload build artifact
        uses: actions/upload-artifact@v4
        with:
          name: site_blog
          path: "./blog/_site"
“Building” the landing pages
For the landing page, I made a separate job that just wraps these HTML files into one artifact. I could’ve merged this job into the same job above though, but I like to waste GitHub’s bandwidth.
1
2
3
4
5
6
7
8
9
10
11
12
13
14
15
16

jobs:
  landing_build:
    runs-on: ubuntu-latest
    steps:
      - name: Checkout
        uses: actions/checkout@v4
        with:
          fetch-depth: 0

      - name: Upload build artifact
        uses: actions/upload-artifact@v4
        with:
          name: site_landing
          path: "./landing"
Merging and Deploying
Since we have two packages each wrapped in the artifact, we will extract these two into the same directory, and the we upload a new artifact that contains the structure as described in the goal. GitHub provides a convenient Action called actions/upload-pages-artifact and actions/deploy-pages that constructs a suitable artifact for GitHub Pages to deploy. I also used actions/configure-pages here, just in case.
1
2
3
4
5
6
7
8
9
10
11
12
13
14
15
16
17
18
19
20
21
22
23
24
25
26
27
28
29
30
31
32

jobs:
  deploy:
    environment:
      name: github-pages
    runs-on: ubuntu-latest
    needs: [blog_build, landing_build]
    steps:
      - name: Setup Pages
        id: pages
        uses: actions/configure-pages@v4

      - name: Download blog artifact
        uses: actions/download-artifact@v4
        with:
          name: site_blog
          path: "./BUILD/_site"

      - name: Download landing page artifact
        uses: actions/download-artifact@v4
        with:
          name: site_landing
          path: "./BUILD/_site"

      - name: Upload github-pages artifact
        uses: actions/upload-pages-artifact@v3
        with:
          path: "./BUILD/_site"

      - name: Deploy to GitHub Pages
        id: deployment
        uses: actions/deploy-pages@v4
Conclusion
Was it too complicated? I guess, but it’s a bit of a fun adventure for me to refresh back my knowledge on these CI/CD interfaces. The last time I used this kind of thing was during my college years, and after graduating I’ve been working on embedded devices and never touched these again. As far as I remember, these interfaces used to be not free (or very limited), and my university hosted their own GitLab so they can give out free shared runners for the students to use it.
